


How to build a Discord community for your brand
 With over a quarter of a billion users, Discord is one of the most popular ways gamers communicate online. Discord lets friends communicate directly via voice, video, or text, and join servers where larger communities can interact together.
Gaming is definitely where Discord earned its popularity initially. However, any online community can take advantage of the features Discord offers. Currently, brands are also looking to jump into the bandwagon of Discord, and receive the benefits of it like online community.
So, below are the few things brands must follow to create successful Discord communities.
Decide if Discord is right for your brand
Before you invest time and resources into a Discord community, make sure it’ll be a good fit for your brand. Here are some factors that affect how well Discord could work for your community.
-
Your industry. Discord tends to suit B2C businesses better than B2B since it’s a casual platform originally meant for gamers.
-
Audience interests. Age and buyer behavior will affect your audience’s interest in using Discord. Younger, “geeky” audiences tend to use Discord more than older, less tech-familiar groups.
-
Funnel stage. Discord works well for customers near the bottom of the marketing funnel: people who already know your organization and product.
-
Message archiving. If you plan on including a knowledge base in your community, Discord lets you search all of your server’s previous messages regardless of how many you have.
-
Audio and video capabilities. Discord’s signature feature is its voice and video chatting, which could serve some communities better than others.
-
Threading capabilities. Discord has a thread feature, but those threads eventually archive themselves.
-
NFT/crypto support: Discord recently considered adding NFT and cryptocurrency features, which could be positive or negative, depending on your stance.
Set goals
Before you build your community, give it goals that will guide your community design and moderation. Some popular goals for brand community Discords include:
-
Connecting your customers
-
Sharing brand updates
-
Humanizing your business through a community
-
Building customer loyalty
-
Sharing tutorials and offering support for your product
-
Creating an exclusive community for customers or supporters
You’ll notice that most of the reasons I listed here aren’t related to direct selling—they’re about building trust with customers.
Create your server and channels
With your goals in mind, you can now create your server and its channels. To start a new Discord server, click the plus sign beneath your server icons on the left side of your screen. From there, you can create a server from scratch or choose a template. The templates give you a list of channels to start with that you can edit however you like. After you choose a template, Discord will ask if your server will be for a club or community or a private group. Discord isn’t very clear about how this question affects your server, so choose the community option or skip it. Now, for the most important part: your server name and icon. Choose a name that includes your business name and an icon that matches your other brand assets, such as a logo. You have your Discord server now.
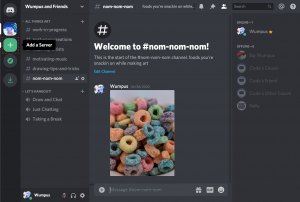
Time to add channels. Think of your Discord server’s channels as different places to talk about specific topics. You’ll see them to the left of your server’s messages. Text channels let you communicate with text and photos like other messaging apps. Voice channels allow the people who enter it to talk over voice and video. Make sure your channels tie back to the goals you set for your community. For example, if you want to build a community for your customers, you could make channels based on everyday discussion topics like pets or TV. Or maybe you want to share brand updates—make sure to give them a dedicated channel.
Depending on your objectives, you can make your server a Community server with added promotion features and analytics.
Set rules and roles
Community servers have built-in rules pages that members have to read and approve before posting. Your server’s rules should help you facilitate healthy discussions and create a safe space. Once you’ve taken care of the rules, it’s time to create Discord roles for your community members. Roles determine a member’s admin permissions, accessible channels, name color, and appearance on your server’s Online list. This Discord support article explains how role hierarchies and permissions work in detail, and it’s worth checking out as you’re getting started.
Promote your server
Now that your server is ready to go, it’s time to promote it in places where potential community members will see it. If you keep your community open to the public, use your invite link to its fullest potential. To find your Discord invite link, click the arrow next to your server name in the upper-right corner, and select Invite People. From there, you can share it anywhere potential members will see, including social media, email newsletters, and your website. Anyone who clicks on your link will be prompted to join your Discord community. Don’t underestimate the power of consistent reminders.
Nurture your community
A Discord server is an ongoing investment. You’ll need to stay involved in your community to keep it growing. Assign moderators or administrators to handle any issues in your community or help members with Discord features. When your community is small, you don’t have to hire a dedicated community manager, but as it grows, you might consider moderators. And just like in real life, you can’t expect a conversation in Discord without contributing to it. Ask your team members to take part in community discussions. You don’t always have to have profound things to say.
Once you get a good base of people talking in your Discord community, try running events like giveaways, polls, or get-togethers. You can schedule an event in one of your text or voice channels by clicking the arrow next to your server name and choosing Create Event.
Related Posts
How to Increase Facebook Engagement Without Running Ads
YouTube’s New In-App Messaging Feature Explained

Does Buying YouTube Watch Time Affect Monetization?