


Create an amazing Intro Video for your Youtube channel for free
 In a bid to make their videos appear more professional, many vloggers create animated intros the use as their videos’ “opening credits.” Not only do these short animations look amazing, but they also serve as a branding tool. However, creating these animated intros can also be time-consuming to do yourself or expensive if you hire someone else to do it for you.
Here’s an easy and free way to create an animated intro for your own channel.
1. Start a new video project in Adobe Spark.
As a content creator, you’re likely already familiar with the Adobe Suite. You might use Adobe Premiere Pro to edit your videos, or you might turn to Adobe Photoshop to create awesome thumbnails. Adobe products are an industry standard in many different creative professions, including content creation.

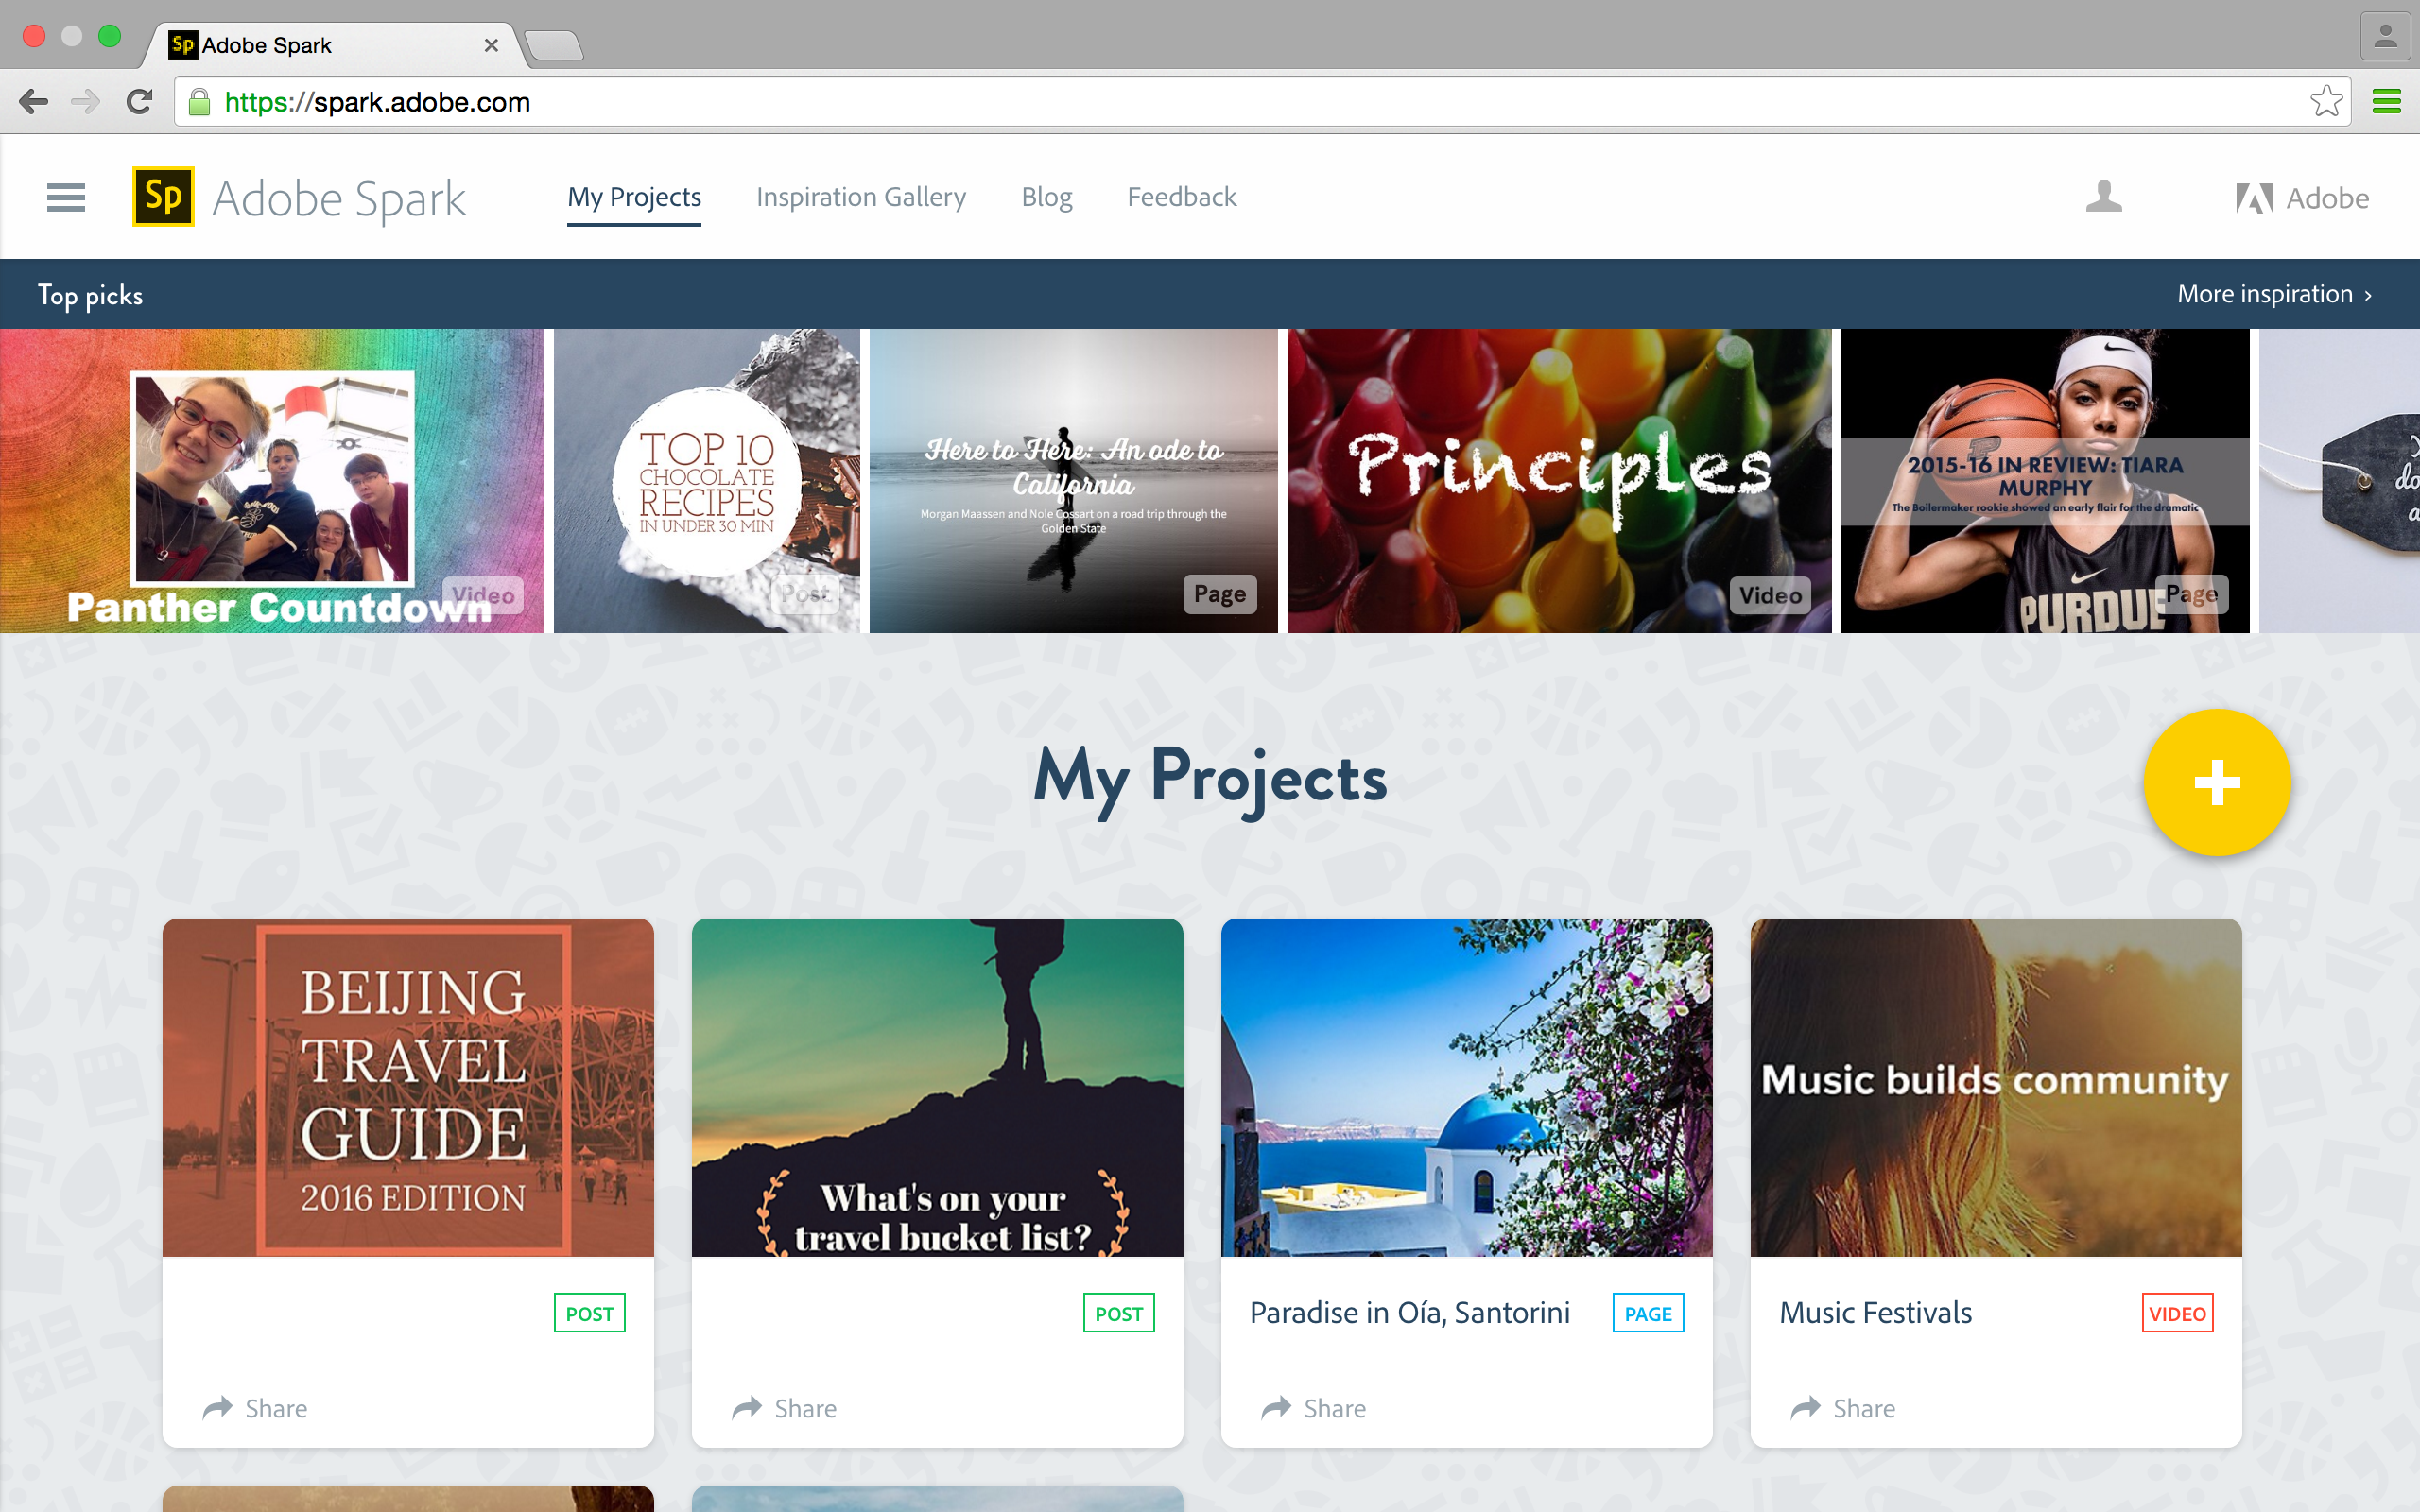
Adobe created Adobe Spark as a free, online tool content creators can use to make things for social media. You can design graphics, templates, web pages, etc. The platform also has a video tool, which you can use to create YouTube video intros.
To get started, sign up for a free account. You can easily login with the same Gmail account you use for your YouTube channel. Then, click on the blue “Create a project” button in the top left corner. Select “video” from the drop-down menu.
2. Choose a title and a template.
Once you begin your project, you’ll be prompted to give it a title. If you plan to use the same intro for all your videos, make the title something simple like “[Channel Name] Video Intro” so you can easily find it later on. However, if you’d prefer to make custom intros for every new video, give your project a more specific title, such as “[Video Title] Intro.”
Next, a carousel of story templates will appear. You might choose one to help guide your creative direction, especially if you want your intro to tell a story. For example, if you want your intro to give viewers a quick overview of your background, you might choose the “A Hero’s Journey” template. If you wanted your intro to hype your viewers up for the video, you might decide on “An Invitation.”
If you don’t find a template that aligns with your goals, you can scroll to the end of the carousel and select “Make Up My Own.” Alternatively, you can go underneath the carousel of templates and click on the red “Start from scratch” button.
3. Upload your own media.
Adobe Spark videos work similar to PowerPoint or Google Slides. You can add different media to different slides, then you can reorder the slides however you’d like. Choose from photos, videos, text, or icons.
Adobe Spark offers free stock pictures for you to use. You can search from Adobe Stock or Creative Commons. You can also upload your own. You can also connect to Google Drive, Lightroom, or Dropbox to find your pictures.
If you want to use video clips, you’ll have to upload your own. Each video clip you upload must be thirty seconds or less. However, shorter clips will be better, so choose ones that highlight the overall idea of your channel or video.
4. Customize your video with different fonts and music.
Once you have all of your media uploaded, you can start customizing your video intro. Add text to highlight important points, such as your channel name or upload schedule. You can change the font under “Theme.”

You can also add background music. Select the “Music” tab in the top right corner. From there, you can choose from a variety of background music, which is organized by mood. Alternatively, you can upload your own music.
Once you’re finished with your video intro, go to the top of the page and select “Download.” It will be automatically downloaded as an MP4, which you can upload to your video editing software of choice.